Debit & Credit User Guide
Split Categories
When You Will Need That
Sometimes a single transaction should be assigned not to just one, but a few categories. Consider the following example: you go to a store and spend $20 for groceries and $30 for household items in a single transaction. The only way to record this transaction in a meaningful way is to assign both "Household" and "Groceries" categories to it with the respective amounts.
Entering amounts for split categories is optional. If you leave one or more amounts for split categories blank, the app will automatically calculate these amounts based on the total amount you provided (the calculation will take place once a transaction is created).
Example
John spent $90 at the store. $40 is related to groceries, the rest is equally related to household items and drinks. He creates a transaction with the total amount of $90 and the following split categories: groceries, household and drinks. He specifies the amount for groceries ($40) only, the amounts for household items and drinks will be calculated automatically once the transaction is created.
Creating a Transaction With Split Categories on Mac
Move the cursor over the category combobox and then click the plus button when creating a transaction:
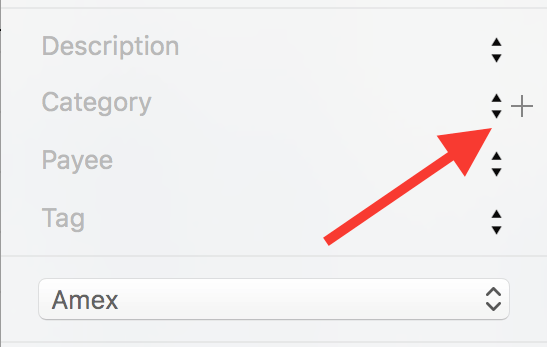
To delete a split category, delete its name first and then click on the minus button.
Creating a Transaction With Split Categories in iOS
Start creating a new transaction, then tap on the plus button near the category text field to go to the list of categories for selection. Tap on the "Split" button in the upper-right corner:
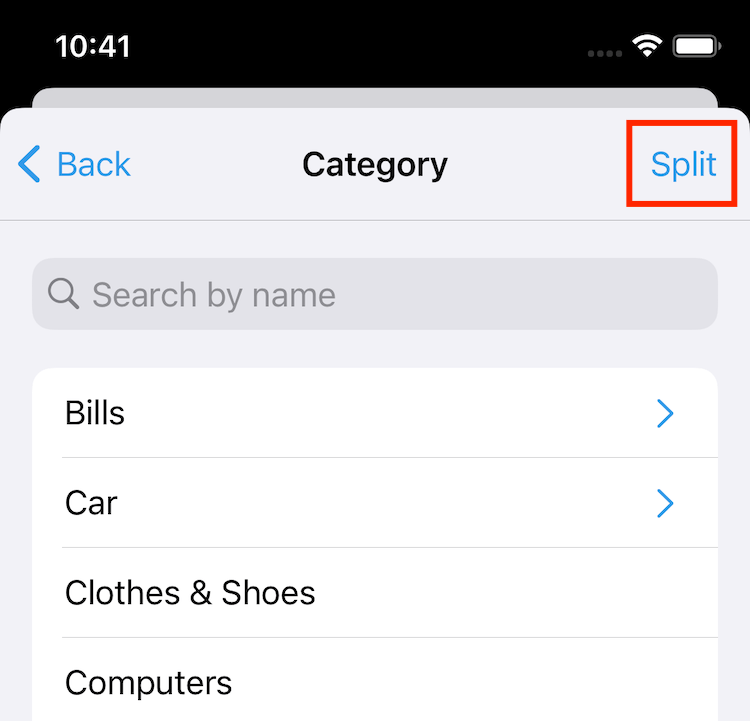
To delete a previously selected split category, use the left swipe gesture. After you select all relevant categories, go back to the new transaction form.
Mixed Split Categories
In very rare cases you might want to create a transaction that will include both expense and income split categories. For example, you received a salary with particular deductions that you want to account for. In that scenario, you can apply expense split categories to an income transaction.
In iOS, this feature needs to be activated in the advanced app settings (“Transactions” section). On Mac, just hold option on the keyboard when creating a new split category (when clicking on “+”) next to the “Category” field.
Related topics: transaction tags, transaction attachments, statement reconciliation.